Within Teams meetings, there are three roles:
The meeting organiser will be the only presenter in Teams meetings unless this is manually changed. Other meeting participants join meetings as attendees, not presenters. The table below details what each role can do within a Teams meeting:
| Capability | Organiser | Presenter | Attendee |
|---|---|---|---|
| Speak | X | X | X |
| Enable Video | X | X | X |
| Participate in meeting chat | X | X | X |
| Share content | X | X | |
| Privately view a PowerPoint file shared by someone else | X | X | |
| Take control of someone else's PowerPoint presentation | X | X | |
| Mute other participants | X | X | |
| Prevent attendees from unmuting themselves | X | X | |
| Prevent attendees from enabling camera | X | X | |
| Remove participants | X | X | |
| Admin people from the lobby | X | X | |
| Change the roles of other participants | X | X | |
| Use End Meeting Option | X | ||
| Change Meeting Level Options | X |
NOTE – Consider what roles participants in meetings should have. If you make a pupil a presenter, be aware that they can then mute or remove others as well as present their screen and manage the lobby.
Managing the Lobby and Changing Presenter/Attendee Settings #
In Advance #
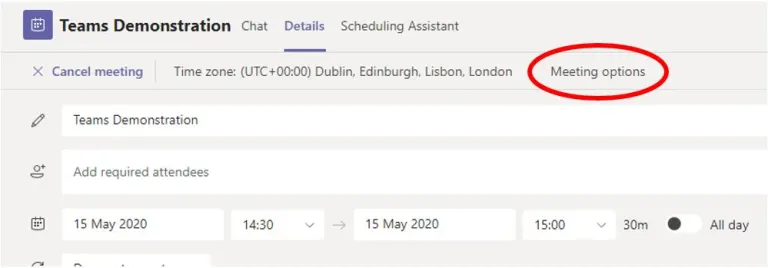
After creating a scheduled meeting the organiser can edit the meeting and choose Meeting Options from within the calendar link.

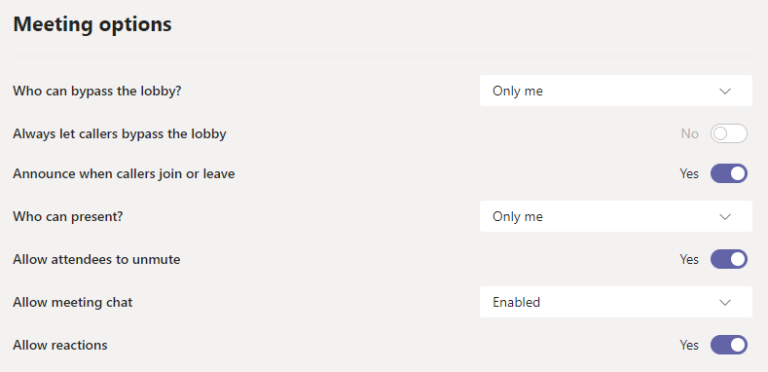
Meeting options will open:

The available options for Who can bypass the lobby? are:
By default the lobby will be set to automatically admit ‘Only Me’ and all participants will be held in a lobby. If participants enter the meeting before the organiser, the meeting organiser will be notified the meeting has started as there are users waiting in the lobby.
Once admitted into the meeting any presenters can allow participants access to the meeting. However they must first be admitted by the organiser (or a presenter already in the meeting). Being a presenter does not allow them to bypass the lobby.
The available options for Who can present? are:
It is recommended for meetings involving students you should select Only me. You can change this during a meeting if required.
You may want to choose Specific people as presenters before the meeting. Anyone you specify as a presenter must be directly invited to the meeting as a named individual before they can be selected. For example this may help if want other staff to share their screen or a presentation or to help manage other meeting settings such as muting pupils. NB this does not allow them to bypass the lobby if it is set to Only Me – the meeting organiser must still be present in the meeting to admit a presenter.
Allow Mic for Attendees #
This enforces a ‘hard’ mute for all attendees and prevents them from unmuting unless allowed to by a presenter. This can be set before the meeting in Meeting Options, or can be enabled during the meeting. For full details on how to use the feature please see:
Allow Camera for Attendees #
This disables attendees’ video cameras and prevents them enabling their video unless allowed to by a presenter. This can be set before the meeting in Meeting Options, or can be enabled during the meeting. For full details on how to use the feature please see: (microsoft.com)
Allow Meeting Chat #
(applies only to meetings held outside of channels – meeting chat in channels is controlled by the channel settings).
This allows the meeting organiser to disable the use of chat during a meeting. By default meeting chat will be enabled for staff. Students are unable to use meeting chat in meetings outside of the channel.
Disabling meeting chat removes the ability to use chat for all meeting participants including the organiser. During the meeting only allows the chat to be used only when the meeting is active, and it will be disabled when the meeting ends.
Allow reactions #
Live reactions allow users in a Teams meeting to express a range of reactions such as Like, Love, Applause and Laugh. These appear in the ‘Show reaction’ section in meeting controls where Raise hand is. The reactions appear for a few seconds in the live video feed or on the profile picture.
* Live reactions aren’t currently available in the web version of Teams.
Changing Presenter/Attendee Settings #
During a Meeting
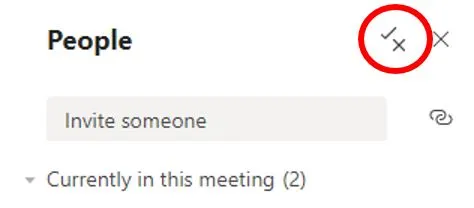
For both Scheduled meetings and Meet Now the Organiser can use the Participants List to access the Meeting Options (accessed from the top right of the Participant List.)


In addition, individual users’ settings can be changed directly within the Participant list:
This will be Make an attendee or Make a presenter as appropriate


